
How to Use the Mobee App: A Step-by-Step Guide
So, you downloaded The Mobee App! That must mean you’re ready to be completing Missions, earning points, and redeeming all those sweet rewards.
But, where to start?
Opening up the App
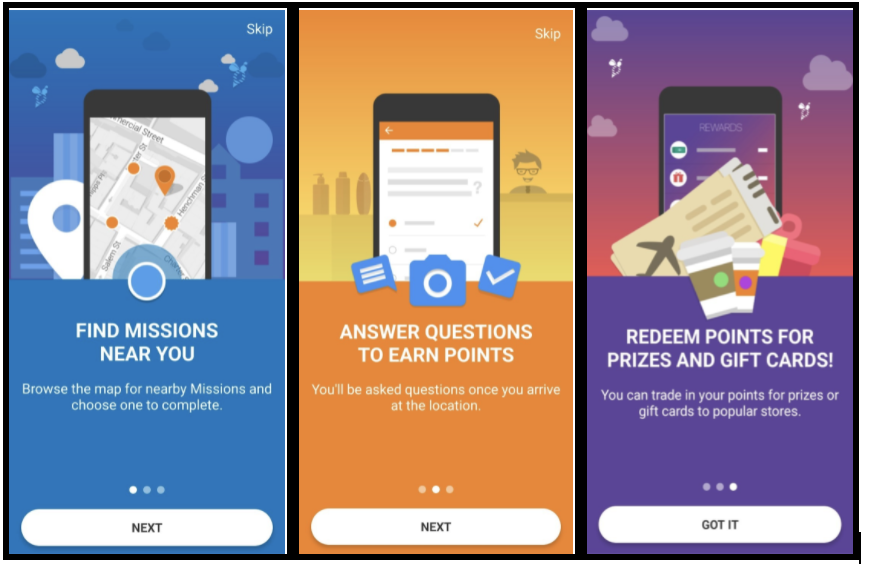
Upon opening the app for the first time, you may be met with some informative images about Mobee. These images will tell you about finding Missions, answering questions during those Missions, and redeeming your earned points afterward.
Simply scroll through these infographics, read all the information, then click “Got it” to continue.
Creating an Account
This will take you to the screen for setting up your Mobee Account.
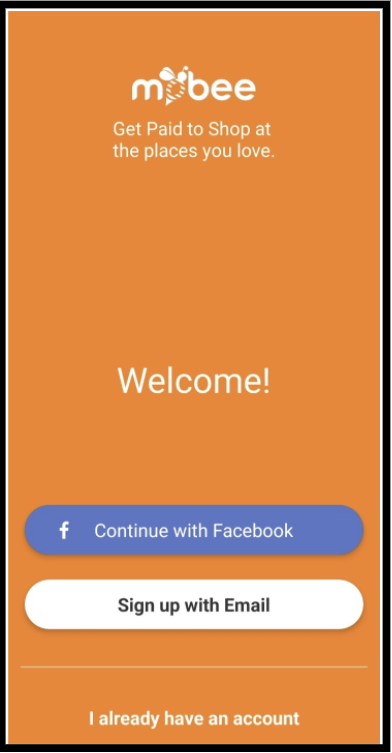
You have the option of creating your account using your Facebook information or linking it to whatever email you prefer. For the email option, you must put in your valid email address and enter a password to use on the account.
Then, after you have entered your information, you will be met with a screen listing all of the Mobee App Terms & Conditions.
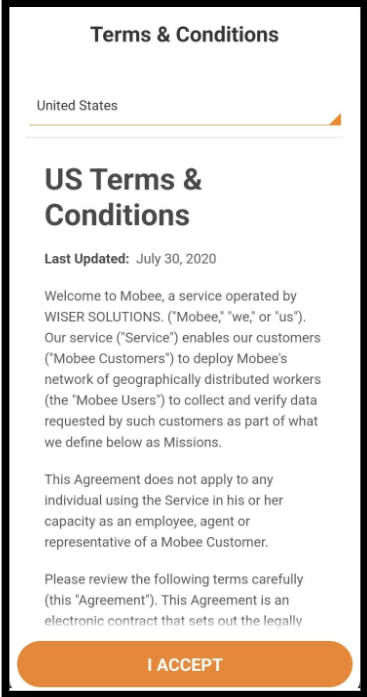
Read through these at your discretion before clicking “I Accept” to continue.
Lastly, you will be met with a screen asking you for a referral code. If you have been referred by a friend, you can put in their code here. Once you successfully complete your first mission, you will both get a referral bonus of 300 points.
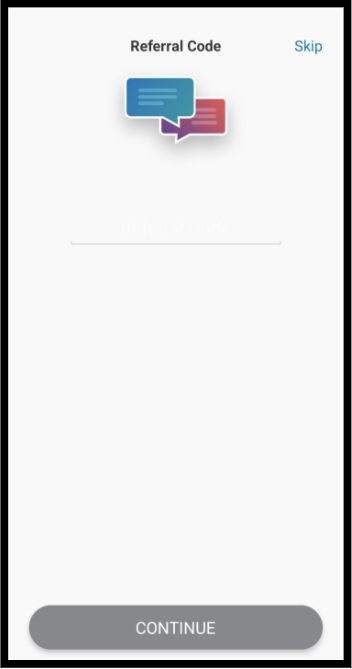
If you have not been referred by a friend, then simply click on the “Skip” button in the top right corner to continue.
Exploring the App
Now that you’ve gotten into the app, there are several different pages you should take some time to get familiar with.
Missions
The Mobee App will automatically put you onto the Missions tab every time you login.

This page will have a map with every possible mission marked with either an orange, grey, or golden pin.
- Orange – Active Missions
- Grey – Inactive Missions that will become available soon
- Gold – Featured Missions (Usually worth more points)
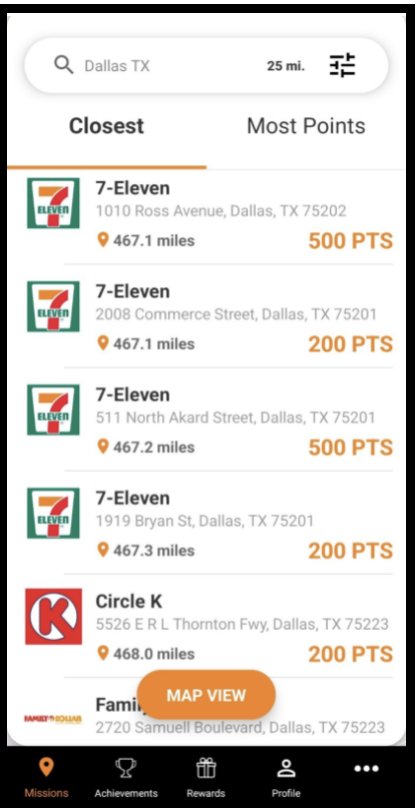
You can use the search bar at the top to look for Missions in a specific city or click on the “Search this area” button to look for Missions near your location.
To specify your search even further, click on the three lines next to the search bar at the top and it will bring up some filtering options.
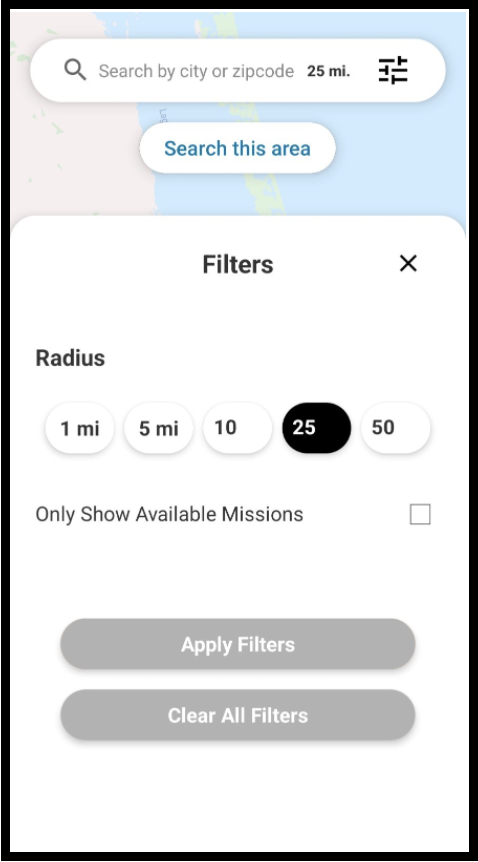
In this page, you can adjust how big of a radius you want to see on the map to either show you a larger or smaller area around you. You can also check the box that says, “Only Show Available Missions,” to get rid of all the grey pins on your map. This way you are only seeing Missions you can complete now.
Once you have changed your search preferences, click on “Apply Filters” to see your new results.
At the bottom of the Mission tab, you can pull up a list of all the available Missions instead of looking at the map view. These can be viewed either by proximity to your location or by highest value of points.
Clicking on a mission will bring up some more information on the location of the mission, how many points it’s worth, and what the actual mission is called. In this example, the mission is called, “Chocolate Hills II Mission.”
Clicking on the button at the bottom of the screen labeled “VIEW MISSION” will bring up more thorough details about the Mission and what you will have to do to complete it.

In this example, the mission should take up to 25 minutes, require up to 14 photos taken, and includes up to 28 questions to be answered. The Mission also asks that some specific products and/or displays be located within the store.
Achievements
The next tab over at the bottom of the screen next to the Missions tab is the Achievements tab.
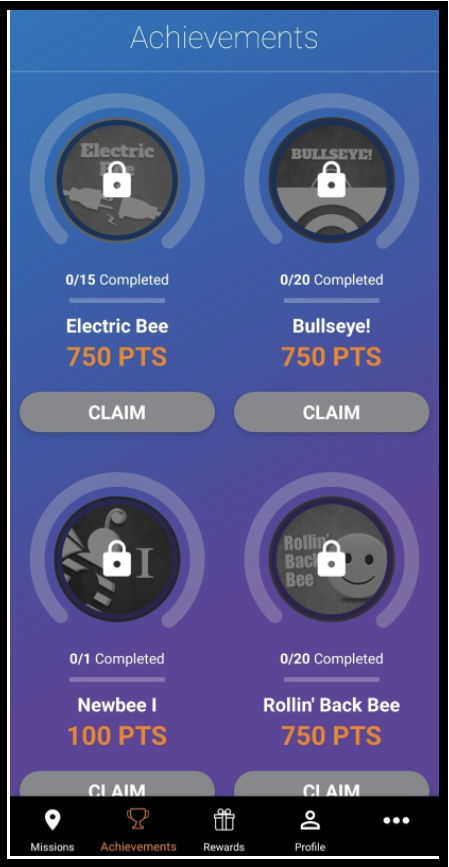
Here, you can see your progress with different available achievements. Some achievements, like “Electric Bee,” will require to complete a certain number of Missions at a particular store. Other achievements, like “Newbee I,” will ask that you complete a certain number of Missions in a day.
There are multiple different kinds of achievements, all of which can earn you additional points when completed. Just click on a specific achievement to learn what you need to do to claim it. Once you have met all the achievement requirements, just click on the “Claim” button to receive your bonus points.
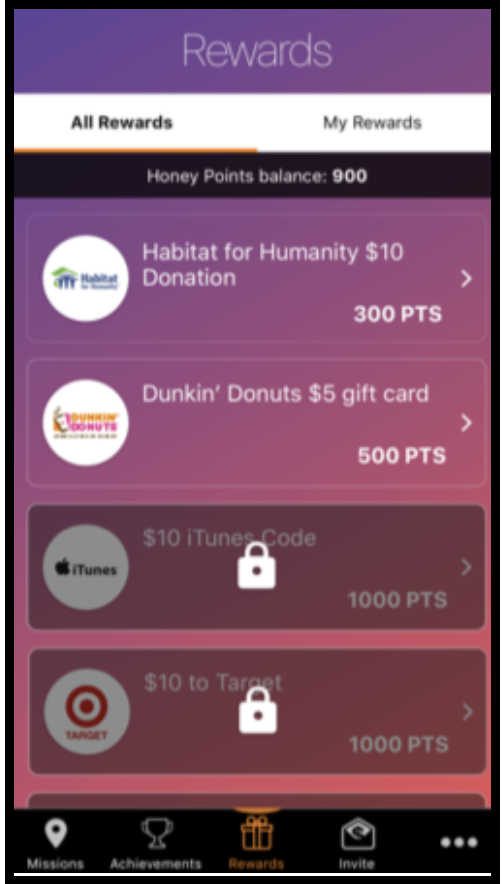
Rewards
The next tab after Achievements is the Rewards tab.
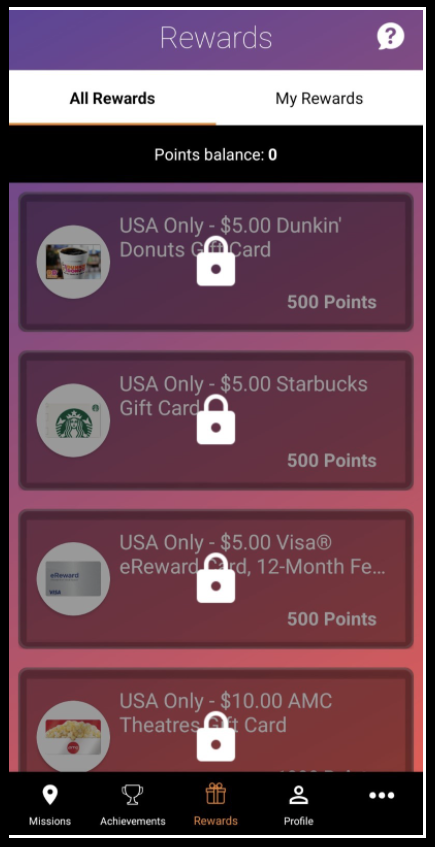
Here, you can view all possible rewards to be redeemed with your Mobee points from accepted Missions. There are a wide variety of different options to choose from, ranging from coffee, to grocery, to home goods. There is even an option for a Visa gift card that can be used almost anywhere you may need it.
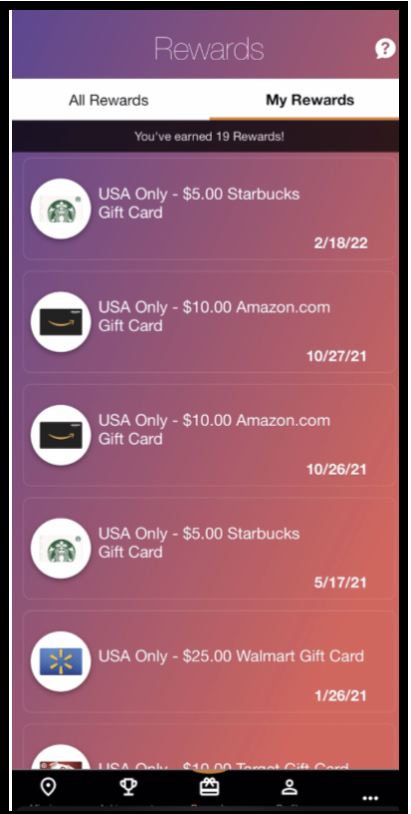
Once you have redeemed your rewards, you can click over on the “My Rewards” tab to see what you have available to you. (This section needs to be revised once I receive more insight.)
If you have any issues with your rewards, click the question mark icon on the top right of the screen to be redirected to the Mobee rewards help email address. There, you can submit your issue and should receive swift feedback.
Profile
The next tab after the Rewards tab is the Profile tab.
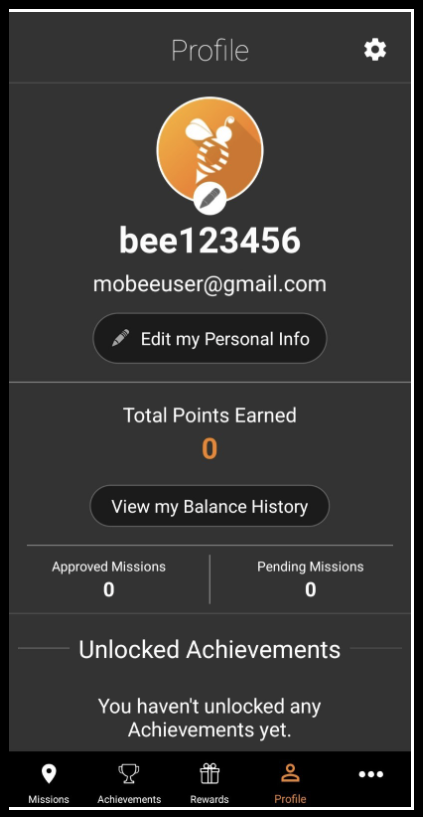
Here, you can view all your main Mobee data, like points earned, Missions completed, or any achievements you may have unlocked. You can also view your given Bee ID number, listed email, and profile image.
If you wish to change the image, simply click on it and choose if you want to update from your phone’s gallery or from the camera.
If you click on the button “Edit my Personal Info,” you will be prompted with a list of demographics questions that you can choose to answer.
To change your username from the automatically generated Bee ID number, or update your account password, click on the gear symbol at the top right of the screen. If you wish to change the email address you have listed on the account, you must contact support and request a change of email address.
The gear symbol is also where you can sign out of your account if needed.
Mobee Help Menu
The last tab all the way to the bottom right of the screen is the Mobee help menu. It should appear as a three-dot symbol.
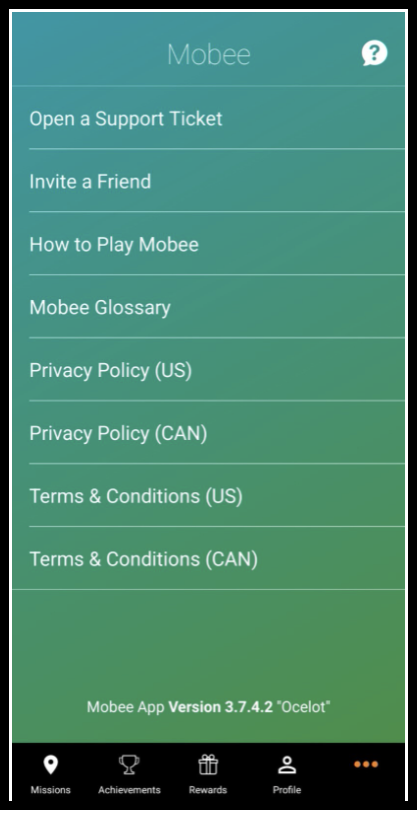
Here is where you can find any help or support you may need while using The Mobee App.
You can submit a support ticket, invite others to become Bees, look at the Mobee FAQ, check out the Mobee glossary, and view your applicable Privacy Policy or Terms & Conditions at any time.
The Mobee glossary in particular can be extremely helpful if you don’t understand a term being used during a Mission. It’s often better to check if your question has been answered rather than giving up or submitting an unsuccessful Mission.
Some common retail terms to know:
- Endcap Display – A display or a product located at the end of an aisle.
- In-Aisle Display – A display or a product located inside the aisle.
- Blocking – The way a shelf is organized. Shelves may be organized by brand, flavor, pack size, etc.
- Vertical Blocking – When products are arranged in a top-to-bottom strip and types change while looking from left-to-right.
- Horizontal Blocking – When products are arranged in a left-to-right strip and the types change while looking from top-to-bottom.
- Chaotic blocking – When it is difficult to determine how exactly shelves are blocked.
- Shelf tag – Price tag on the shelf. A shelf tag will also have the stock, corporate, and unit price information, barcodes, product description, and unit price info.
- Price Tag – Located on the product. This will only have the price of the item, and any promotions or deals.
- Wide Angle Photo – Captures as much of the aisle/category as you can fit. May be taken on a slight angle.
- Straight On Photo – Focused directly on the product/brand/display that you’re in front of.
- Adjacencies – The specific products/brands/categories that are directly above, below, to the right, or to the left of the product/brand/category being asked about.
On the top right, there is another question mark symbol. This will open a pop-up message with several Support Ticket options.
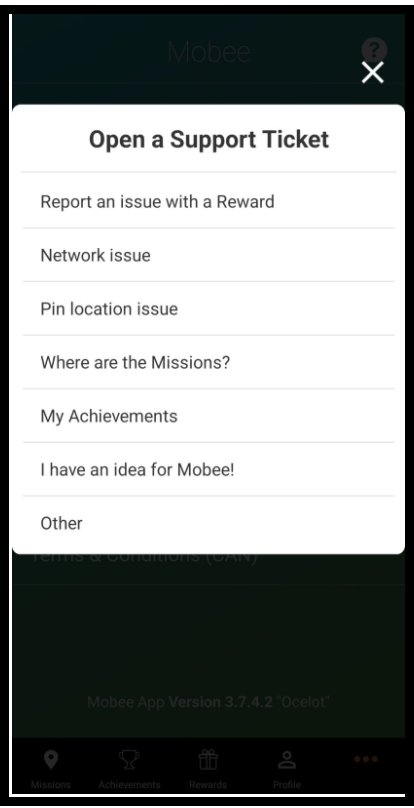
Here you can submit a ticket for any problem you may run into, or even just submit a suggestion to Mobee if you feel there is somewhere that the app can be improved.
How to Choose a Mission
Choosing your first Mission can feel like a lot of pressure when you’ve never done it before, especially if you have a lot of available options in your area. Some things to consider are length, and store options.
Choosing a shorter Mission with fewer tasks for your first time may help you feel confident. You can enter the store knowing that you won’t be there for too long, and you can leave as soon as the Mission is completed.
It may also help you to choose a store that you already frequent regularly. This can help you feel more relaxed and comfortable navigating the store and feeling less conspicuous.
How to Complete a Mission
Missions can ask you to complete a number of tasks, including taking pictures, asking employees questions, making purchases, finding specific products, and other tasks. If you click on the “View Mission” option on a specific Mission you are considering, the details of that mission and what will be asked of you should be listed.
Things to Avoid
- Spending Too Long in One Area—This can increase suspicion from employees who may assume you are a secret shopper, which is the number one thing to avoid.
- Standing Alone in Plain Sight—Especially when you are trying to take pictures of displays, standing there and awkwardly snapping a photo with your phone in plain view can definitely raise suspicion.
- Being Rude to Employees or Other Patrons—Not only should you always try to be a kind person but being outwardly volatile will pull unnecessary attention toward you and could potentially disrupt your Mission. Being polite could also increase your chances of getting good responses from employees if the Mission should require any questions to be asked.
- Not Having a Game Plan—When walking up to an employee to ask a question, you should do your best to come off as just an average shopper. Ask about the product like you’re legitimately curious about buying it. Try to sound sincere and reasonable.
Receiving Feedback: Accepted or Rejected
Once you have filled out all the questions and taken any necessary photos for a Mission, you can go ahead and press “Submit.” Your Mission will then be reviewed by the Mobee validation team, and you will find out if it has been accepted or rejected within 24 to 72 hours.
If your Mission has been rejected, you will receive an email from Mobee stating any issues found with your submission and you will not have any points added to your account. You can still attempt to complete more Missions after this and should try to learn from any mistakes you have made previously.
If your Mission is accepted, you will receive a notification from The Mobee App that points have been added to your account and your submission has been accepted.
Redeeming Your Mobee Points
Each time you successfully complete a Mission and receive points, those points will be added to your Mobee account. You can use points immediately if you have enough to redeem rewards, or you can let your points accumulate until you have enough to redeem larger rewards.
Only rewards you have enough points to redeem will be available to you in the rewards tab.
If you click on a reward, you can read more information about it and press the button on the bottom of the screen to use however many points is needed. You will then be taken to a screen that lists the terms and conditions for that reward. Click “Got it” to continue. After this you will see a page congratulating you for redeeming your reward.
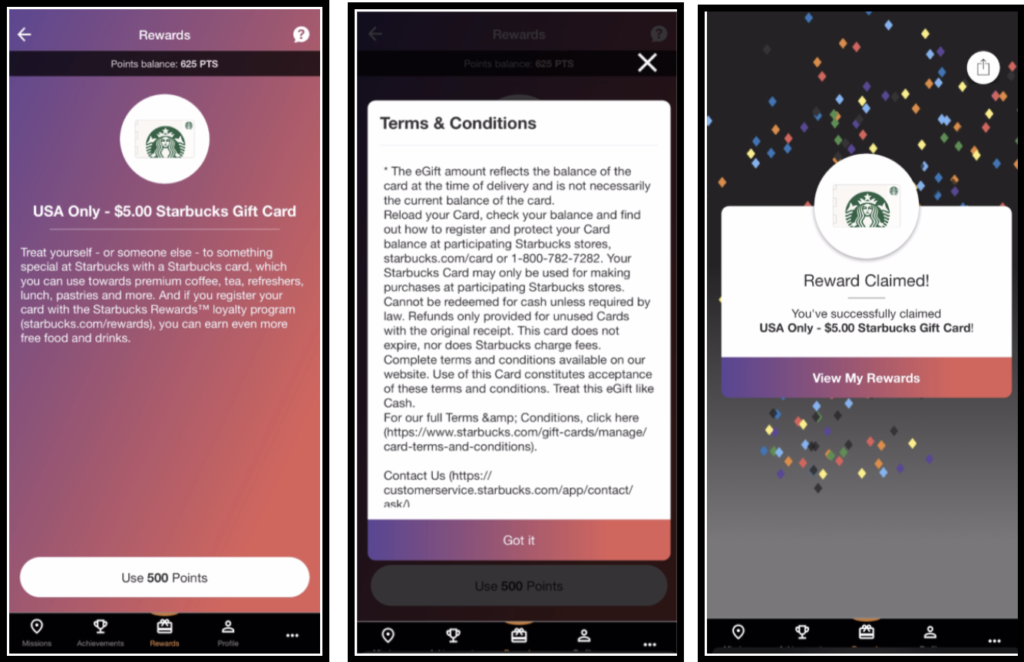
Any rewards you redeem will appear in the “My Rewards” tab of the Rewards page in the app.
Other Resources
For any other questions you may have that were not addressed here, feel free to check out The Mobee Blog, submit a ticket, or even look around for Mobee Bee groups on social media.